Moving Existing Content Over to Reverb
Instructions for moving content to the WebWorks Reverb format in WebWorks ePublisher 2012.2.

Lauren Lever
The release of WebWorks ePublisher 2012.2 will be bringing some exciting innovations to the Reverb format. The convenience and functionality of Reverb is something we don't want any ePublisher user to have to do without. We are often asked, “What is the level of complexity to moving content to Reverb from another format?” Well, the answer is quite simple, so we've decided to dedicate this Tips & Tricks to helping you get your content moved over to the WebWorks Reverb format.
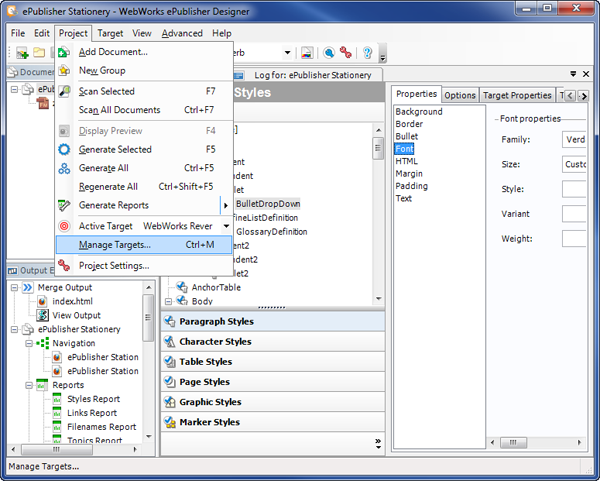
Step 1:
After opening the Designer project that maintains your Stationery, select the menu item: Project > Manage Targets
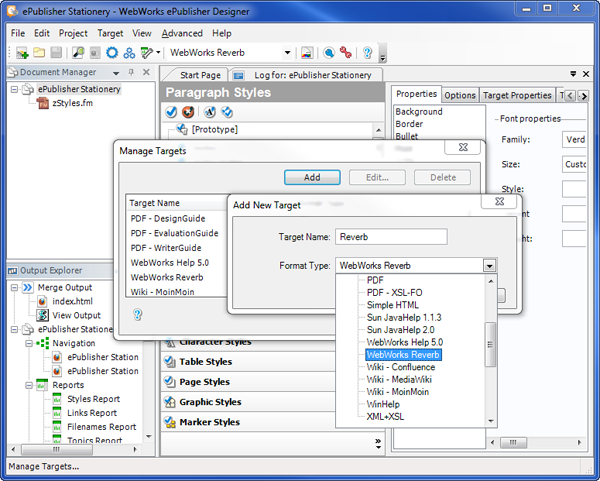
Step 2:
Select “Add,” and then specify your unique name for your new Reverb target (in this example, we've simply named ours Reverb). Now choose “WebWorks Reverb” from the Format Type dropdown menu.
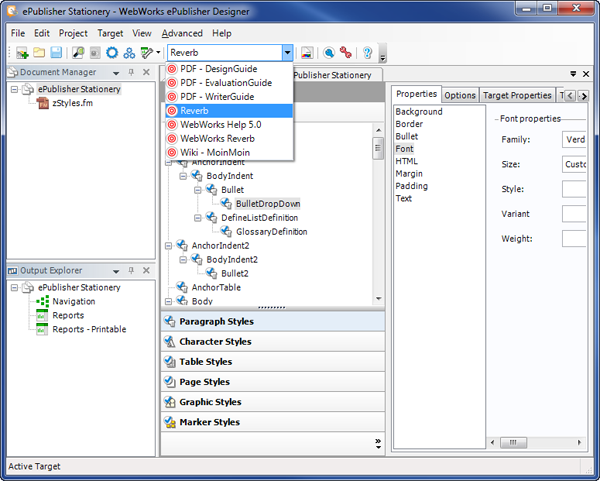
Step 3:
In the target's dropdown box, select the name of your newly created Reverb target (in the previous example, we named ours Reverb). Now you're working on your new Reverb target within your existing Designer project.
Step 4:
Select the “Generate All” button to generate the new output. All of your style settings that were previously configured will be retained, leaving little if any additional work to perform. Once you are content with your conversion results, you can then re-create your stationery. Now your new Reverb target will be available to all pre-existing ePublisher Express projects.
