Tips & Tricks - Customizing Reverb Output
Learn how to customize your WebWorks Reverb output for a tailored design.

Lauren Lever
Customizing Reverb Output
To fully understand how Reverb can be customized, you first need to envision your final output. Once you have this vision in place, it's time to start translating that design to your WebWorks Reverb layout. Reverb is sectioned into different parts, which means you will have to access different sections within ePublisher Designer to achieve your desired design layout.
Let's get started from the top:
When you first generate your Reverb output, a toolbar will appear at the top of your page. Reverb already has Responsive UX coded into it, so it will maximize the screen real estate of the end user's display.
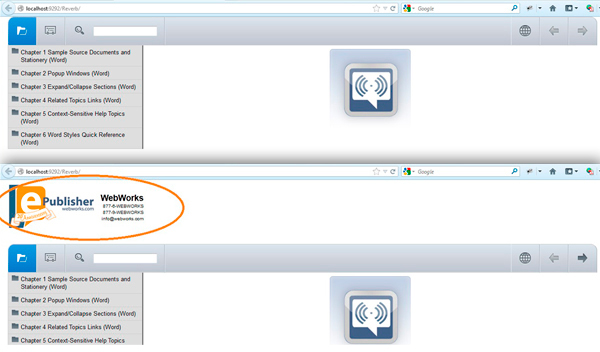
There is actually space for a header just above the toolbar; however, if no information is applied here, it will not render in the final output.
So let's begin with the header:
To insert a header, you will first need to locate Target Settings.

Once you have located your target settings, you will see options that allow you to set up the header (this is done in the Company Information section).
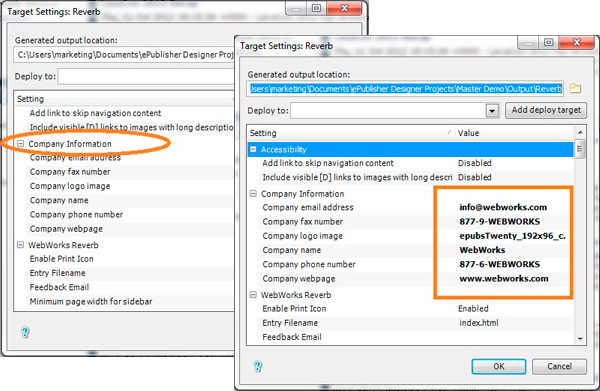
Within your target settings, you will also find options to toggle email on and off, adjust your printing capabilities, and set up Google selections.
Now that we have our header, let's move on to the toolbar and table of contents.
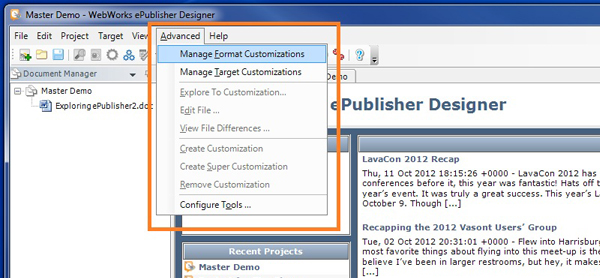
These alterations will be done by modifying files found in the advanced tab, either under Manage Format Customizations or Manage Target Customizations.
To customize files in this view, simply select a file with your pointer, right-click, and select Create Customization.
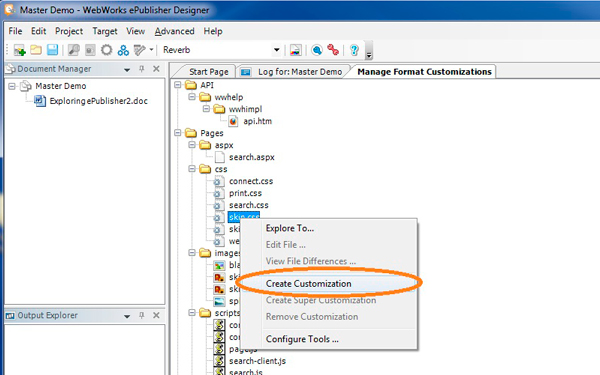
The file will appear in bold to let you know that it is being modified. Access the file by either double-clicking on it or by right-clicking and selecting "Explore To" to open Windows Explorer on the folder that contains this file. This is where you will make the changes to the skin of your output. You can change the color scheme, location of buttons, appearance of buttons, and behaviors. Modifying these files in ePublisher Designer is quite simple. You can either open the file and edit it yourself or, in the case of the images, replace them altogether.
Tip: If you go to the view tab, you can look in the Format Override Directory and see where the new custom files are located.
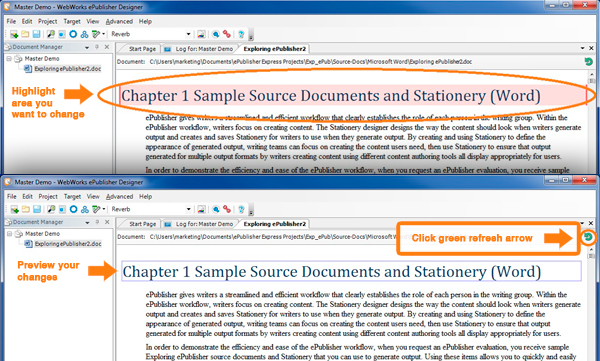
Finally, let's change your source documentation content.
To change source document content, select a file in the Document Manager window and press the Display Preview hotkey.

This will open a sample of your content in the preview window. As you select text areas, the style will have a highlighted background. Here, you can make your desired changes, press the green refresh arrow, and view the results.
In summation, to maximize your Reverb output customizations, you must access three separate areas in ePublisher to give you full control over your customizations. If you would like further insight into customizing your Reverb output, be sure to check out our resource page. Also, join an ePublisher Study Hall session for more guidance.